Hello everyone! I'm back today with a full tutorial on how we installed our subway tile backsplash in the kitchen.
To refresh your memory, here's a look at the finished product...

If you missed it, you can click HERE to see the big reveal post with more pics of the finished backsplash.
We're definitely not experts, so this is just our opinion on what worked in our situation, but I hope it'll be helpful if you're contemplating doing this kind of project. :)
I'm just going to jump right in and start by showing you some of the supplies we purchased...
We bought your standard 3" x 6" white subway tiles at Home Depot. I think our backsplash covers about 26 linear feet (somewhere around 37 square feet) and we purchased three boxes of 100 tiles for a total of 300 tiles. We broke several while trying to cut them and about 10 or so had little blemishes on them, so we ended up with only about 15 extras.
We weren't sure if we wanted to use 1/8" spacers, or 1/16", so we bought both and tried each one out. Below is the 1/8".
And here's the 1/16". We went with the 1/16". The other one showed too much grout for our taste.
Here's a close up of what our subway tiles look like from the side. When you put them together, they're actually wider at the top than the bottom. They kinda form a "V" so to speak. This means that you're going to see more grout than it looks like. Another reason we went with the smaller, 1/16" spacers.
We used the standard Acryl Pro adhesive shown here.
We chose the Polyblend Non-Sanded Grout in the color "Bright White."
This is the grout sealer we used. We used a little less than half of this bottle. It also came in a spray, which probably would have been easier to use. (This was the very last step in the process, more on this later)
Tile nippers...
V Notch wall trowel...
HDX 14" Tile Cutter from Home Depot...
We used two layers of this paper to protect the counters. They also sell rolls of brown paper, but this was about half the cost.
Our first step was to remove the old tiles.
These were the first tiles we removed. You can see what the drywall looked like behind them. There was a lot of leftover adhesive.
Here's a closer look...
These are the tools we used to remove the tiles. They worked like a charm!
This whole area below was removed solely by me in about 10 minutes.
We used this Craftsman multi tool to scrape the old adhesive residue off the walls.
See that whole section of wall in the pic below? It only took my hubby about 30 minutes to smooth it down with the multi tool.
Here's what the wall looked like after he smoothed it out and removed the old adhesive.
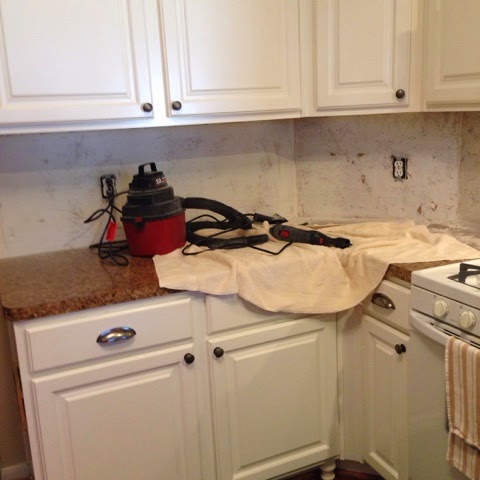
Now, here's where we had a problem. For some reason, this section of tiles took a lot of drywall with them when we removed them.
So here's how we fixed it. First, I literally vacuumed the walls with my Dyson attachment to make sure they were free from dust. (I vacuumed the walls again after we were completely done using the multi tool, and right before we started installing the tiles)
Then we used this joint compound to fill the holes.
Here's what it looked like after we filled the holes in with the joint compound.
And here's what it looked like the next morning after it dried.
Here's another problem area. The pic below is the wall behind the microwave. There were huge holes after removing the tiles. The only option here was to replace this section of sheetrock. We were able to buy a 2' x 2' piece of sheetrock for about $4. My hubby cut the damaged piece out and nailed the new piece to the studs, then floated and taped it. We didn't prime or paint the new piece of sheetrock prior to installing the subway tiles.
Below is what it looked like with the new piece of sheetrock installed. You can also see the little wood piece we nailed up in the space where the stove was. Since there wasn't a counter there, we needed something to support the bottom row of tiles while installing them. We gently nailed it up, then removed it when we were done with the project.
We then cut out the old caulk where the counter meets the walls.
Okay, now don't laugh, but we had this weird gap between the counter and the wall right behind the sink area. Can you guess what we used to fill it with???
A pool noodle, y'all! Lol! We were desperate to start the project and REALLY didn't want to make another trip to Home Depot, so we used what we had on hand and it worked! :)
They sell those wedge things to place under the bottom row of tiles, but our store was sold out, so we used two strips of poster board and it gave just the right amount of gap so we could still caulk between the tiles and counter.
We chose to apply the adhesive to each individual tile and then stick it to the wall. Some people prefer to slather the adhesive to a large area on the wall and then apply the tiles, but we liked doing it this way because we could always quit at any time. We weren't locked into putting up an entire area of tiles just because it already had the adhesive on the wall. And also, that's how we saw Chip Gaines do it. ;)
Below you can see my hubby installing the bottom row of tiles on top of the poster board.
We had a lot of crazy cuts that had to be made around what seemed like countless outlets. My hubby also used his Rockwell Versacut saw with a diamond blade to make some of these funky cuts.
After we got all the tiles up, we waited about 24 hours, then it was time to grout. This is what it looked like right after we applied the grout...
After we applied the grout, we immediately removed the excess with a squeegee as you can see here...
Then we waited 15 minutes and smoothed the grout lines with a damp sponge. Below is what it looked like after we smoothed everything out with a damp sponge.
After smoothing it out with a damp sponge, we waited 2 hours before wiping down the haze with cheesecloth.
Then we waited 24 hours before installing the wood trim and caulking.
We decided to use this decorative wood trim from Lowe's on the sides instead of bullnose tiles. The wood came already primed and I painted it using Olympic ICON self priming semi-gloss interior paint in Base 1/Ultra White. (this is the same paint we used on our framed in windows and window sills)
Below is the wood trim prior to painting it.
After we nailed it up, we filled the nail holes, caulked around it, and did some touch up paint.
Here's a pic of the wood trim installed...
This is the caulk we used where the tile meets the counter, since it's made for wet areas. We just used a regular caulk at the top of the tile (where the tile meets the bottom of the upper cabinets) since it wasn't prone to ever being wet.
I think you only need to wait about 48 hours before sealing the grout, but we ended up waiting about 4 days because my hubby was working. The grout sealer worked great, but like I mentioned before, the spray bottle version would have been easier. You basically squirt the sealer on the grout lines, using the little brush tip. It'll drip down onto the tiles, but we just wiped it up immediately with paper towels.
Here's another pic of the grout sealer we used. You can see we didn't even use half of this bottle.
This is the little brush tip at the top of the bottle.
And that's it! We LOVE how it turned out!
I think I covered just about everything, but if you have any other questions, please don't hesitate to ask. I'd be happy to help out any way I can. :)
If you're interested in our tutorial on painting our kitchen cabinets white and adding those little cabinet feet, click HERE
~Lisa