Selasa, 09 Februari 2016

Valentine's Day Decor 2016


I'm Finally getting around to sharing my Valentine's Day decor. Loving this cute heart pillow from the dollar spot at Target. 


Technically this frame is up year round, but since it has hearts, I'm including it. :) These are my boys about 15 years ago... 


I kept things pretty neutral in the living room. 


I made this new banner for a whopping $1.50. I bought one piece of floral scrap paper at Joann's and one pack of heart shaped paper doilies at Dollar Tree. I cut heart shapes out of the scrap paper and alternated them with the doilies on some twine and secured them with mini clothespins. 


Just a few Valentine touches on the rolling cart...


I promise that's not dust on the dough bowl. :) The sun was shining in at a weird angle, plus this pic is from my phone, so there's that. Not that there isn't dust in other areas of my home, just not on this dough bowl. Ha! 

I love vintage looking Valentines. 


The hutch in the breakfast room always gets a little love...


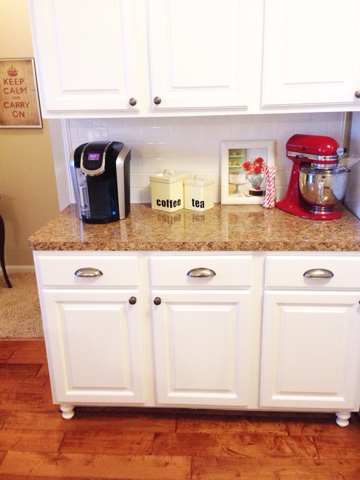
I even changed the wall paper on my Keurig to red in honor of Valentine's day. Lol! 


Finally putting my stash of paper straws to good use. Love the ones with tiny hearts! 


Another vintage Valentine in the kitchen with a pink Circle E candle. 


I had to add hearts to the welcome sign... 


And a little cheer to the door...


That's it! Hope everyone has a Happy Valentine's Day!

Senin, 01 Februari 2016

Greek Yogurt and Bunnies

I wanted to share my new favorite yogurt with y'all. It's Chobani Flip Greek Yogurt...


And no, I'm not getting paid for saying this, it's just a real favorite of ours. Oh, and I know the expiration date says January 26th, but don't worry, I took these pics awhile ago and am just now getting around to posting. Rest assured, this was consumed way before that date. ;) 

So, have y'all tried this? Here's what's under the lid of the Almond Coco Loco one...


You flip the toppings onto the yogurt for a delicious breakfast or snack. 


That's a lot of toppings!

The yogurt tastes like really thick, sweet whipped cream to me. (I've tried other Greek yogurts and they weren't nearly this good. They always tasted too "tangy" for me, but this one is just right) It also has 12 grams of protein, so it keeps you full for a long time.

It comes in lots of other flavors too...


Three of my favorites...Coffee Break Bliss, Peppermint Perfection, and Almond Coco Loco...


They have tons of other great flavors too. Here are a few more I pulled out of the fridge. Tropical Escape, Key Lime Crumble, and Peanut Butter Dream.


The Peanut Butter Dream has moved up to my favorite this week. This description says it all...


If you like peanut butter and chocolate, you'll love this!

Okay, now for the bunnies. My sister in law texted me to see if I wanted these bunnies...


She was cleaning out stuff and knew I'd always admired them in her home during Easter. I of course said yes, so they hauled them all the way from North Texas when they came for a visit. 

When they arrived, my niece said "Aunt Lisa, why in the world did you want these things?" I asked her what was wrong with them and she said "Well, for one...their EYES. They're SO creepy!"

Take a look for yourselves...


Hmm...Then she said "And the FEET! They're the creepiest of all!" 


Girl's got a point. 

 Apparently these two were the source of a few nightmares for my niece and nephews while growing up. Although Meredith's feet don't seem as bad as Finn's. (yes, I already named them Meredith and Finn and no, I've never seen Grey's Anatomy, although someone just told me there were two characters on there with these same names. Total coincidence, I guess)


So the jury is still out on these two. What do you think? Creepy or cute??? I think a little of both. They would be kind of cute holding decorative Easter eggs in their baskets this spring. Y'all should have seen Holly's first reaction to them...she approached them VERY slowly and sniffed them out before backing away. 


After all that, I must leave you with a smile on your face. Have y'all seen the Dairy Pure Milk commercial starring these adorable cows with a Valley Girl accent?


My favorite part is when the one in the middle says "Like, moo" at the end of the commercial! So funny! I was having trouble getting the video to upload, but you can google "Dairy Pure Commercial YouTube" to see it. 


~Lisa


Kamis, 28 Januari 2016

Homemade King Cake Recipe...Again

I know I posted this recipe last year, but with Mardi Gras approaching, I thought I'd share it again, only with more pictures and a step by step this time around. :) 

Once again, I used Emeril's Quick King Cake Recipe found HERE, only I omitted the fruit pie filling. If you click on the recipe, you can get a printable version. 

It was just as good as I remembered. :)


Here are the ingredients you'll need...


Crescent rolls, cinnamon, butter, cream cheese, powdered sugar, granulated sugar and food coloring.

You'll need the 12 ounce package of crescent rolls like this one.


First, mix up 8 ounces softened cream cheese and 1 cup powdered sugar.


Then mix 1/4 teaspoon cinnamon and 1/4 cup butter.


Unroll crescent rolls in one piece. Press seams together to form one piece of dough.


As you can see...it doesn't have to be perfect. ;)

Then gently spread the butter/cinnamon mixture over the dough.


Then drop spoonfuls of the cream cheese/powdered sugar mixture on top.


Please excuse these pics...I was trying to take them quickly, with one hand, while trying not to get my phone sticky. :) 

Starting at the long end, carefully roll the dough, horizontally, with the filling inside. Then place on baking pan (I lined mine with parchment) with the seam side down in a circle, pinching the ends together and bake at 350 degrees 15-20 minutes.

Here's my (blurry) pic right before it went into the oven.


While it's baking, you can color your sugar. For some reason, the purple color is a little off in this pic.


To color the sugar, I filled three Ziplock bags with 1/4 cup granulated sugar each and added drops of food coloring. 

Here is the formula I used to get these particular shades of yellow, green, and purple:

Yellow: Two drops yellow food coloring
Green: Two drops green food coloring
Purple: One drop blue and three drops red food coloring.

I just put the drops in with the sugar and worked it in by massaging the bag until it was all incorporated.

So, here's what it'll look like when it comes out of the oven...


Definitely not perfect, huh? Ha! It doesn't matter too much what it looks like, because you can cover up any imperfections with the icing. 

After the cake cools, mix up 1 cup powdered sugar, 1 Tablespoon lemon juice, and 1 Tablespoon water for the icing. Pour the icing over the cake and add the colored sugar.

As you can see, mine's still not perfect (far from it, in fact) but it tastes SO good!


I refrigerate mine after I put the icing on.


I got lots of compliments on it. It's so moist and delicious! Much better than the store bought ones, in my opinion. :)


Have you ever made a King Cake? I was surprised at how easy this one was. Y'all have a great day!

~Lisa

Senin, 25 Januari 2016

A New Mirror and a Feature

First of all, I want to thank Beckie of Infarrantly Creative and Knock Off Decor for featuring my DIY Restoration Hardware Inspired Rolling Cart today. It was a total surprise when she contacted me last week to let me know she was going to share my cart! Click HERE to see it on her blog. Thank you again, Beckie! 

Okay, now for the new mirror. I've been looking for a new mirror for my dining room for weeks and weeks. I finally found this one and am so happy with it!


For comparison, here's how it looked BEFORE with the trio of sunburst mirrors...


And again, the AFTER with the new clover mirror...


I love my plate wall in here, but ever since I added the sunburst mirrors on the opposite wall, I thought it was too many circles, too close together. So, I've been looking for a single mirror for that spot.

I found this new mirror at Target and it was only $19.99! I added the burlap ribbon for a little extra height. 


The size and color was perfect!


I hung the mirror with the built in hangers on the back and just hot glued the burlap ribbon as a decorative touch. I looped the ribbon through a picture hanger on the wall to make it look like it was holding the mirror. 


Here's a close up of the finish...


As for the sunburst mirrors, they ended up in our bedroom...


I'll be back soon with a tutorial for a Homemade King Cake. Yum!

~Lisa